Showing posts with label kids. Show all posts

Wednesday, June 13, 2012

Swimming Time!

My kids are almost through with their swimming lessons, and we have been able to swim at my parents' house as well.  We all just love the water!  Well, possibly with the exception of my hubby.  He is learning to enjoy it, but he tends to view the pool as a big petri dish.  I understand that about public pools (no one likes pee in the pool!), but I feel like backyard pools are different especially if they are well-tended.  There is nothing like sparkling blue water full of your family's smiling faces!

We are planning a lake trip this summer, but we don't do too much swimming there.  The water is just too chilly to go out too deep.  However, one of the fun things we enjoy is going out on a boat and that means life jackets.  I love the safety but definitely think the look could be vastly improved!  Drum roll, please...

Check out these adorable life jackets I found on Gilt today.  I love the fin on the back; it is so precious!!  I could just see my kids wearing these in the boat and even while they are playing in the shallow beach area!  Too cute.  Here are my favourites:

SwimWays Angel Fish Life Jacket 
yellow angel fish

SwimWays Clown Fish Life Jacket 
Nemo!

SwimWays Pink Dolphin Life Jacket 
pink dolphin

SwimWays Orca Life Jacket 
orca 
(this would be my son's choice)


Don't these almost make you wish they came in adult sizes??  Swoon!  :)  Let me know if you purchase one of these sweet life jackets!  Unfortunately, my online shopping is currently on hold.  Darn eBay addiction...  {wink, wink}

If you need an invite for Gilt, click here!

Saturday, January 14, 2012

Orange Girl's Bedroom Reveal!

This room had a tall order:

1. It must be orange
2. It must have Nemo
3. It must grow into a teenager's room (the little lady is not into her tweens yet!)
4. It must have space for a desk for homework time
5. It must be very soft to touch
6. No overt girliness
7. No ruffles
8. Open windows (i.e. no drapes or curtains, just wooden slat blinds)
9. Pandas and polar bears should feel comfortable alongside the Nemo collection
10. Bamboo (for the pandas, of course!)
11. Storage
12. More storage


Wow!  Well, we started with the orange base, and I felt like a black and white print would be a good choice to encompass the animal side of things.  A zebra print on the pillow and throw blanket (which can double as a cozy rug) took care of that!  A bright orange furry pillow at the back of the bed is perfect for reading.


Plain black bedding became the base and a selection of fun pillows brought in everything else, plus a good supply of fuzzy friends brought in for a cuddle.  The photo collage frames on the wall above the bed show some of her favourite things, with some frames repeating the zebra print.

The first thing we utilized in the way of storage was this memo board, made from white cotton canvas and black grosgrain ribbon with white stitches on the each side.  The tiny glass beads even tie into the room.  Click on the photo to enlarge it and you will see what we hid in the glass beads!  {Tutorial on the memo board coming soon.}


My friend's dad refinished her childhood bedroom furniture in black and it has lots of shelving which was a bonus!  All those Nemos and other friends needed a place to live, after all.  We hung some zebra prints here also.


There was just enough space here for something.  Some new shelves were built, and a desk added into this tiny nook for a homework centre.  Furry friends have a good view of the bed and windows. 


And last but not least, a tiny corner for one of her bamboo plants and her bow holder that I made a couple of years ago.  I love how it still fits her and her personality!


This room will be easy to transition into a teen room as {some} of the animals are replaced with older girl things.  The orange, black, and white will still be fresh and, best of all, it will continue to grow with her.

She loves it, and I am so happy we were able to give her a room that is perfectly her!


Linking up with some great  parties!

Wednesday, January 11, 2012

DIY Soft Light Sabers

For my son's Star Wars-themed birthday, we set up several different types of games, all with Star Wars flavour!  One of the games was a light saber duel, and we needed something that could be used without harming any of the kids.  We also still needed some kind of party favour.  Enter the soft light saber, a toy that is still getting lots of use in our house a year and half later!

Supplies:
foam pool noodle
electrical tape in 1-2 colours
duct tape in black

magic marker


Directions:

1. Cut the pool noodle in half.

2. Wrap one end of the pool noodle with three strips of duct tape, creating the light saber handle.  Wrap each end of the duct tape in coloured electrical tape.

3. Use the magic marker (we used fat Sharpies) to darken the cut end.

4. Have fun!


Linking up with some great  parties!

Monday, January 9, 2012

Bling Light Switch Cover

I have been procrastinating on this girly toddler room for quite a while.  Apparently so long that she really cannot be called a toddler anymore.  So little girl room it is.  I finally have got some things going on in here, this being my absolute most favourite of late!!!  (I think it warrants extra exclamation marks!  Ha!)

Supplies:

Light switch cover
E-6000 (or other craft glue)
bling! (I used several sizes of clear rhinestones)


Directions:

Glue rhinestones onto light switch cover.  Start with the large and medium sizes around the interior of the switch plate and work your way to the edges.  Use the super tiny size rhinestones to fill in any blank spaces. 


Once finished, I waited 24 hours before hanging to ensure the glue was solid and no rhinestones were falling off.  This is going in the Chanel-inspired girly girl room.  I can't wait to tackle more!

Linking up with some great  parties!

Saturday, January 7, 2012

Neon Pancakes -aka- Pancake Tribute to the 1980's!

Prep your favourite pancake recipe, and separate batter into bowls.  


Preheat your frying pan or griddle while adding colour to each bowl.  I use Wilton gel colours.  They are super bright and you can get big colour impact with a tiny bit of gel.  


Get a large spoon in each bowl.  (Alternately, use one empty plastic squeeze bottle for each colour.)  Spoon (or squeeze) your base colour onto the griddle.  Working very quickly, add some of each colour to each pancake.  I did 3 pancakes at a time, and only had about 30 seconds to get all the colours into each pancake.  You will likely not end up with perfect circles here so if you have OCD tendencies, you may want to skip this!  Ha!  


And flip to cook the other side.  You can tell I started with green!


Ta da!  It is like the 80's threw up onto your pancakes!  Notice the size similarities to 80's shoulder pads...  He he!


Of course, my kids have no clue what the 80's are, so they just thought they were getting super awesome pancakes! 


Linking up with some great parties!

Friday, December 9, 2011

Michael's Knock Off Chenille Chain Garland

Welcome to Day 6 of Creating Christmas!

 Creating Christmas at The Girl Creative
 
I was at Michael's the other day checking out all the Christmas fabulousness, and saw these:


Chenille Chain Garlands!  These are made exactly like the paper chains you made probably every single year when you were little.  Except these were basically made with pipe cleaners!

All you need is a pair of scissors and your pipe cleaners, and you are good to go!


Cut into desired length.  I cut mine in thirds.


Make a loop and twist the ends around each other.  


Thread a new piece of pipe cleaner through your loop, and loop again.  Repeat.


So cute for a kid's tree!  I think it would be awesome in metallic colours like copper and gold!


Linking up with some great parties!


Friday, December 2, 2011

Christmas Tree Crayons

I wanted to make new crayons from the huge amount of broken ones we have!  I have seen so many crayon-makeover tutorials around the blogosphere, but this one is different because (1) they are Christmas trees, (2) I used glitter!, and (3) they are gradient-friendly!  Ha ha!

Supplies:
crayons
silicone ice cube tray
glitter
lots of little people to peel the crayon papers off!
 

Directions:
Preheat the oven to 225 F.  Peel the paper wrappers off the crayons and chop into small pieces.


Assemble similar shades of colours together; pack tightly into a silicone ice cube tray. Add a pinch or two of a similar shade glitter.


Place in the oven for 5 minutes.  Check to see if the crayons are thoroughly melted.   If so, remove carefully and place on counter to cool completely.  If not, leave tray in the oven and check every minute or two until fully melted.  Once cooled, pop out of the tray and enjoy!


I think they are so festive!!  I am going to do a couple trays of these for Christmas gifts and stocking stuffers!

Linking up with some great parties!

Friday, November 18, 2011

Change Table to Closet Organizer

My hubby built a beautiful change table for our second and it has been a dumping ground for quite a while now since our babes is out of diapers!  I couldn't bear to send it to the basement, so I figured out how to keep it in her room, plus actually make it work as something other than a change table.  Here is the final result!

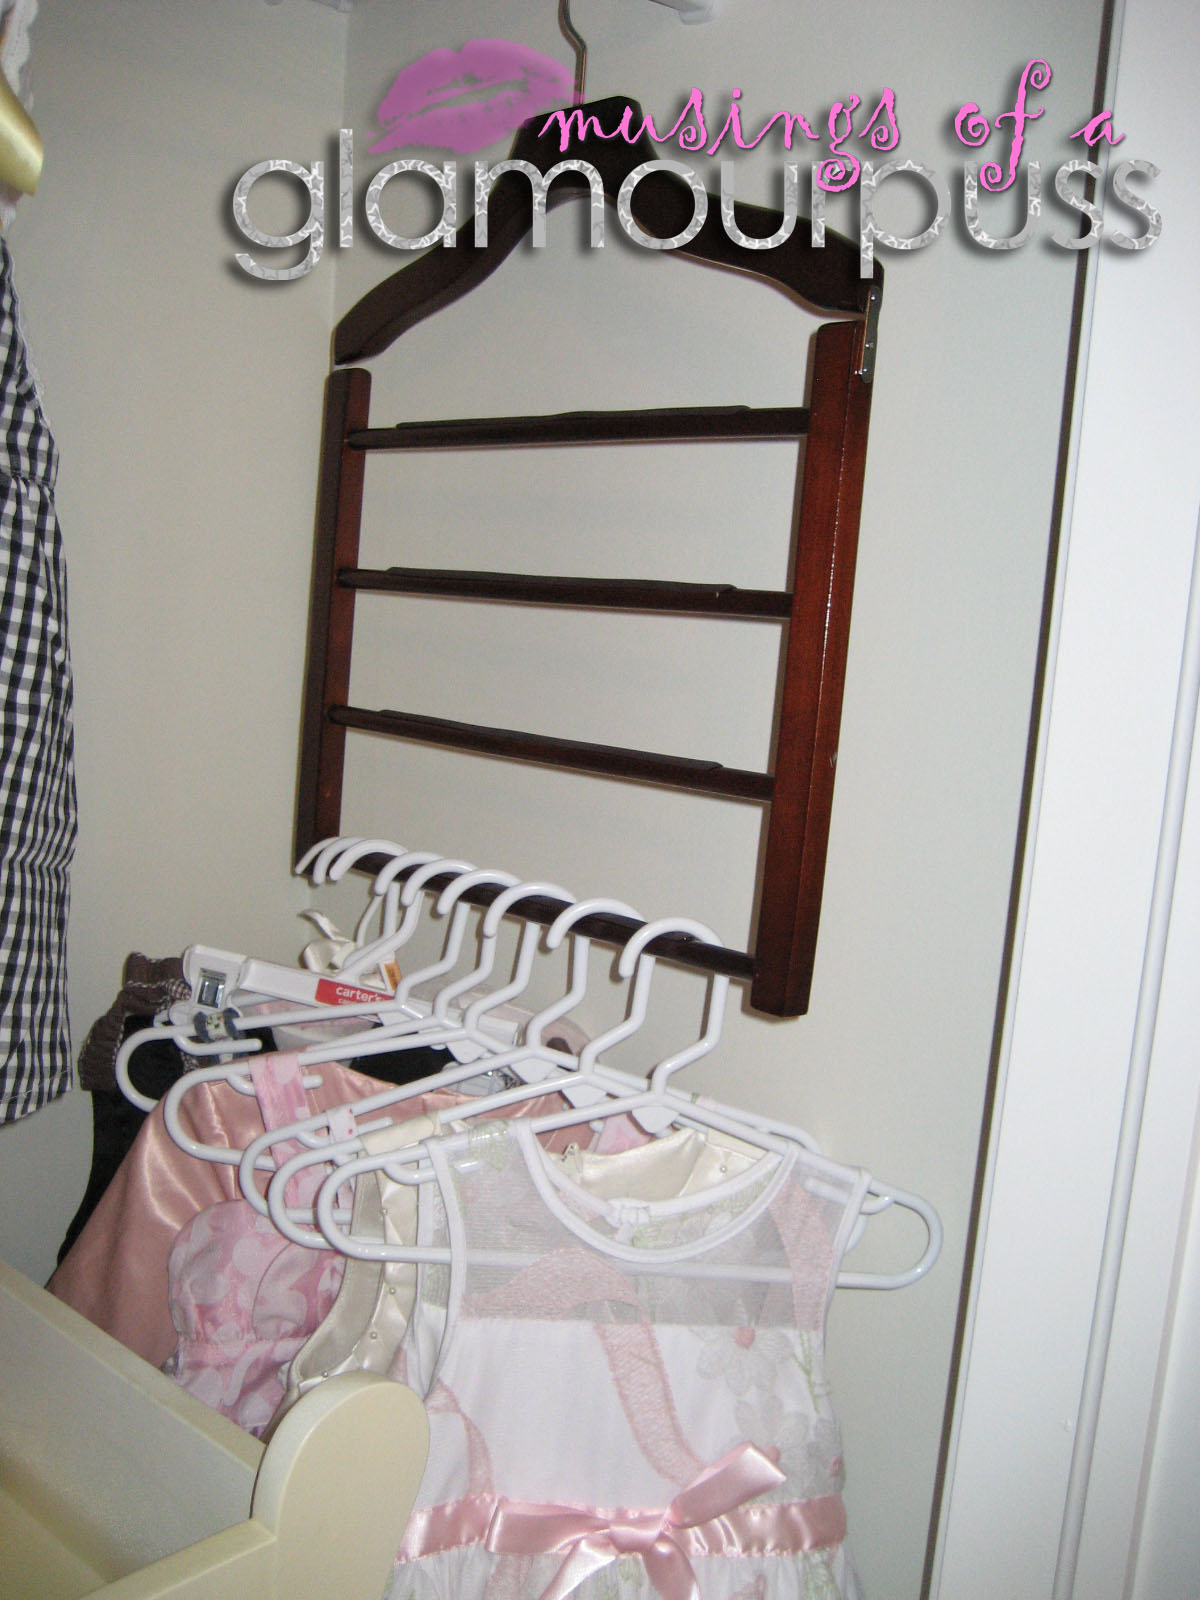
It was a lucky fit!  The change table just fit perfectly in her closet with less than a foot to spare.  She doesn't have enough room in her closet to fit her clothes (single rack only at this point), so we bought a dresser for her.  Still not enough room.  So I grabbed all of her baby baskets that we used for bedding, socks, wipes, etc., and repurposed them for new storage in the middle and on the bottom level. 


 The top level was relegated to shorts, leggings, pants, and bloomers.  Short sleeve shirts, underwear, socks, and pj's all moved to the dresser.  Short dresses hang on the rack and longer dresses hang on a pant hanger down the side of the change table. 

Tutus and pettiskirts go up top with other miscellaneous things.  And it all fits!  :)


And last but not least, I made some cute tags to identify the contents of each basket.  For now, she has to look inside each basket (or try to remember what goes where) since she doesn't read yet.  But she loves it and I love it!  Click here to make the tags.


Linking up with some great parties!

Friday, October 21, 2011

DIY Window Prisms

I wanted to add something special to my daughter's bedroom window.  It isn't too big and I haven't decided on the window treatments yet, so I wanted to do something that would be (a) simple to assemble, (b) easy to install, and (c) removable in case it doesn't work later. 


I picked up some gems from the dollar store in different shapes and shades.  When I opened the package, I noticed the crystals had tiny holes for stringing!  I chose to use small and large pink crystals and spherical clear crystals.  I had lots of clear jewelry string, so each crystal got its own string and a couple were doubled up.  I just taped them inside the window frame and that was it!  The facets on the gems act like prisms and project rainbows into the room when the sun is shining.


UPDATE:  Some of the heavier crystals (the doubled strings) fell.  However, I only used regular scotch tape to hang them.  A little bit of duct tape should do the trick!  (Plus, since they are all attached inside the frame, you can't see the tape anyway!)


 Linking up with some great parties!

Monday, September 5, 2011

Pan Flute Craft

My son made this cute craft at school.  You will need 8 drinking straws and tape for this craft.  

Simply cut straws into four lengths (two straws per length) and tape together!

Blow gently through the straws to play your pan flute!  Try blowing directly on the straws and then without touching your lips to the straws and see what sounds you can make.


Linking up with some great parties!

Monday, August 29, 2011

Noah's Ark Craft

This is such an easy and cute craft for toddlers and younger children.

Print off a picture of an ark.  I made this one when 90 seconds of looking online didn't come up with one I liked.  (Does someone need to sing the Patience Song?  Ha ha!!)  Colour and then cut out.  Parents can help cut if the kids aren't quite at the scissors stage.


Glue onto a dark or stormy colour background.  I had a wonderful blue-grey that was perfect!


Rip tissue paper into long, jagged strips for the waves.  Crunch slightly in your hands and then gently smooth out again for some extra texture.  Using different colours really helps to show depth, so I grabbed bright blue, grey, and black.  Glue starting with the top layer and overlapping as you go.

Place glue dots (use white school glue or hot glue gun, not a gluestick!) in the sky area and attach sequins for the raindrops.  Chalk dots would also look great!

Viola!  Noah's ark in the stormy waves! :)


Linking up with some great parties!

Monday, July 18, 2011

Birthday Party: Jedi Training Academy: The Invite

All great parties start with the invitation.  Being barely associated with Star Wars and all the things that go along with it, I searched online and found several ideas for invitation wording.  I wanted the invitation to be just like the rolling paragraphs at the beginning of the first movie.  (First movie meaning first made, not Episode I.  That still confuses me!)

So I merged several ideas together, rewrote most of it, and came up with this invite:

 
The invitation was placed in a large brown envelope with this label:
 
 
Children who responded were given a second directive:

The invitations were a huge hit and promised of wonderful things to come!


Related Posts Plugin for WordPress, Blogger...