Showing posts with label DIY. Show all posts

Friday, January 20, 2012

DIY iPhone Icon Magnets

My hubby was very sweet and cut out over 20 tiny little icons for me, and the top 20 were chosen to become magnets.  (Those are his hairy manly hands!)


Glass squares or tiles can be purchased as is, or you could use pieces from a sheet of glass mosaic tile - just peel the tiny glass squares off the backing.


Cut the magnets (I used a long strip piece) into squares that are slightly smaller than the back of the glass squares. (Don't want any magnet overhang!)  Use hot glue to attach magnets to glass.


After the glue is completely cool and hardened, attach the picture.  I used a mixture of super tacky craft glue and water (1:1 ratio) and, using a paintbrush, lightly covered the top of the glass with the glue mixture.  


The picture went on immediately and was straightened into place with a toothpick.  I had to work quickly in order to place the picture accurately before the glue dried, which was super fast!  I then repeated this with the other 19 tiles.
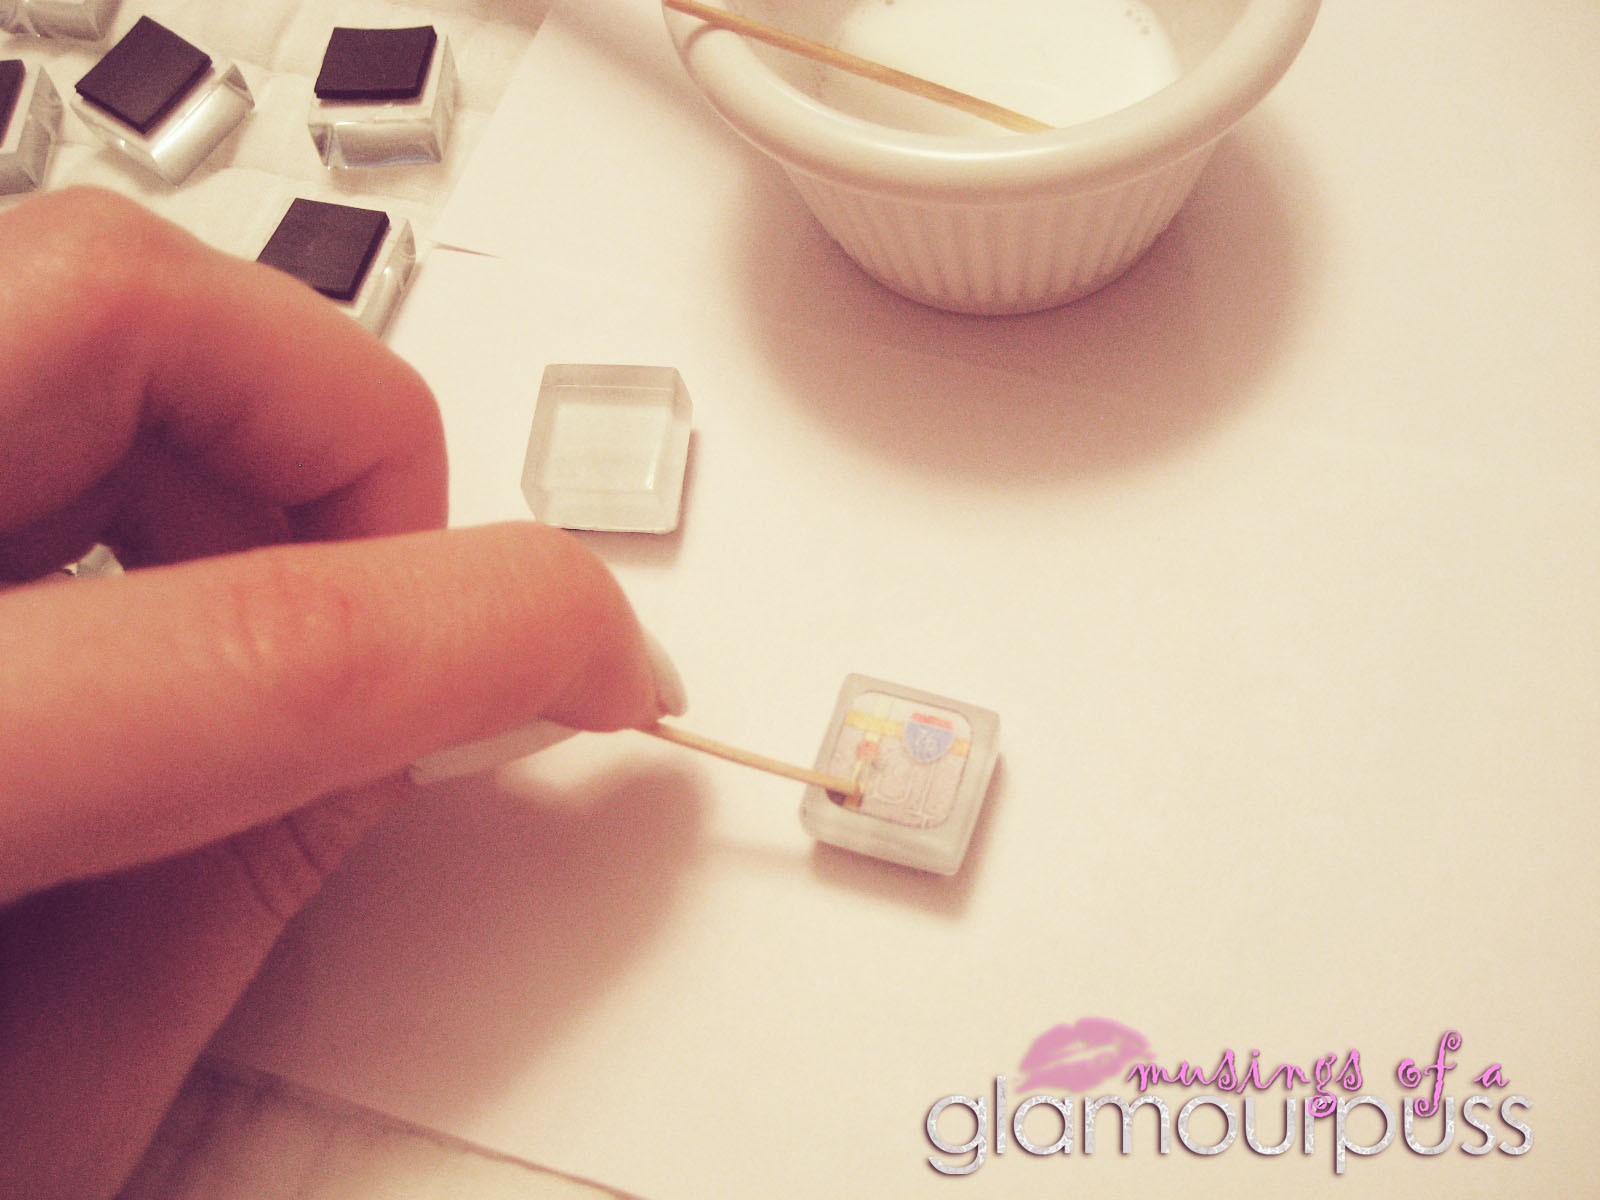

Using the same glue mixture, I painted a light coat over each picture ensuring the glue mixture went right to the edges of the glass.  Let it dry thoroughly.  

 
Repeat!


Let cure for 12 hours, then pop them right onto the fridge!  Great gift idea for the family techie!  (Or the one who thinks (s)he is! Ha!)


Linking up with some great  parties!

Thursday, January 19, 2012

Candy Flavoured Body Scrubs

This is a fun gift that I love to make as much for myself as for someone else!

I bought cute little glass jars that resembled old fashioned candy jars.  The blends were mixed in a bowl, then spooned into the jars.


Each jar got a different candy flavour: Candy Cane, Creamsicle, and Caramel.  The scents were completely made with essential oils and enhanced by the types of sugar that I used.  Grapeseed was my oil of choice as it is one of my favourites!


I cut the ribbon pieces and punched out the labels.


A dab of hot glue attaches the two ribbon ends together.


Another dab of glue to hold the label in place.


Put them in an organza gift bag, tie with matching ribbon, and glue a tag onto the ribbon.  Ta da!

Linking up with some great  parties!

Wednesday, January 11, 2012

DIY Soft Light Sabers

For my son's Star Wars-themed birthday, we set up several different types of games, all with Star Wars flavour!  One of the games was a light saber duel, and we needed something that could be used without harming any of the kids.  We also still needed some kind of party favour.  Enter the soft light saber, a toy that is still getting lots of use in our house a year and half later!

Supplies:
foam pool noodle
electrical tape in 1-2 colours
duct tape in black

magic marker


Directions:

1. Cut the pool noodle in half.

2. Wrap one end of the pool noodle with three strips of duct tape, creating the light saber handle.  Wrap each end of the duct tape in coloured electrical tape.

3. Use the magic marker (we used fat Sharpies) to darken the cut end.

4. Have fun!


Linking up with some great  parties!

Monday, January 9, 2012

Bling Light Switch Cover

I have been procrastinating on this girly toddler room for quite a while.  Apparently so long that she really cannot be called a toddler anymore.  So little girl room it is.  I finally have got some things going on in here, this being my absolute most favourite of late!!!  (I think it warrants extra exclamation marks!  Ha!)

Supplies:

Light switch cover
E-6000 (or other craft glue)
bling! (I used several sizes of clear rhinestones)


Directions:

Glue rhinestones onto light switch cover.  Start with the large and medium sizes around the interior of the switch plate and work your way to the edges.  Use the super tiny size rhinestones to fill in any blank spaces. 


Once finished, I waited 24 hours before hanging to ensure the glue was solid and no rhinestones were falling off.  This is going in the Chanel-inspired girly girl room.  I can't wait to tackle more!


Linking up with some great  parties!

Friday, December 9, 2011

Michael's Knock Off Chenille Chain Garland

Welcome to Day 6 of Creating Christmas!

 Creating Christmas at The Girl Creative
 
I was at Michael's the other day checking out all the Christmas fabulousness, and saw these:


Chenille Chain Garlands!  These are made exactly like the paper chains you made probably every single year when you were little.  Except these were basically made with pipe cleaners!

All you need is a pair of scissors and your pipe cleaners, and you are good to go!


Cut into desired length.  I cut mine in thirds.


Make a loop and twist the ends around each other.  


Thread a new piece of pipe cleaner through your loop, and loop again.  Repeat.


So cute for a kid's tree!  I think it would be awesome in metallic colours like copper and gold!


Linking up with some great parties!


Wednesday, December 7, 2011

Homespun Style Ornaments

Welcome to Day 4 of Creating Christmas!  

 Creating Christmas at The Girl Creative


At our home, the main tree is finally almost done!  Yay!  And it smells so good!  I love the Christmas tree smell; it just makes me want to curl up in a big chair with a hot tea and a good book with only the tree lights on.  

We can't finish our tree for another day or two...  Is it just me, or do the ornament hooks disappear every. single. year.?  I even had the bag out to do two trees, then we were doing one additional tree, and off they went.  (I had two brand new boxes of hooks in addition to all the other hooks in the bag.)  Hubby had to go out to Walmart to get more, but they were sold out.  So he went out again the next day to a different store and got me two boxes.  They're all used up and I have another 30 ornaments or so left to hang...  Gotta find those missing hooks!  Ahhh!

Each one of our trees has a different theme and colour scheme.  My daughter has her pink glam tree, my son has a vintage toy inspired tree, the upstairs tree is gold and natural elements, and the main {real} tree is almost always red with metallics.  I thought I would focus my new-found ornament skills on my son's tree.  It has all the wooden ornaments from my childhood tree on it like rocking horses, nutcrackers, and angels, as well as some miscellaneous things like s'mores ornaments, Starbucks mittens (from gift cards) and hot rod car ornaments.  It's really cute, but I wanted something else to add to it.  So here is what I did...


SUPPLIES

yarn
buttons (if desired)
hot glue gun
styrofoam ball


DIRECTIONS

Begin by gluing a tiny length of yarn onto the styrofoam ball.  Begin to make a tight circle of yarn, gluing as you go.  


Keep wrapping and gluing, wrapping and gluing.  When you are almost done, cut a separate length of yarn about 8 inches long and glue both ends together to the ball.  This will become the hook for the ornament. (Alternately, once finished, just loop a length and glue it down.  Trim the end off.)


Finish wrapping and gluing.  


Glue buttons on the yarn if you would like.  My buttons are actually vintage buttons from my grandmother's button box. 


You can also wrap the yarn in different patterns, just be aware that the time will increase depending on the complexity of your pattern.  I made one with different sizes of circles and it took me about 3 times as long to cover the whole ball.


I also made one that resembles a ball of yarn.  I just wrapped the yarn in various directions all over the styrofoam ball, making sure that no white spots were showing.  Then I tied several loose pieces around the outside in order to have little yarn ends poking out here and there.


Linking up with some great parties!

Tuesday, December 6, 2011

DIY Gem Ornaments

Hooray!  It's Day 3 of Creating Christmas!  I am so glad to be a co-host with several other lovely ladies and The Girl Creative!


 Creating Christmas at The Girl Creative


Without further ado, here is today's Christmas craftiness!

I had some leftover gems from this project, so I thought some coordinating ornaments would be cute.  My daughter's tree is pink, pink, and more pink with silver.  Her ornaments are sequined and the lights are globe-shaped.  Some of the gems are teardrop shaped and her garland is silver cubes, so we are really rocking the geometric shapes here!  Ha!


Simply put an ornament hook through the gem hole (resize the hook to fit) and hang it on the tree! 


So easy and cute.  I think this would be really precious done on a tree with only beads and pearls.


Linking up with some great parties!

Friday, December 2, 2011

Christmas Tree Crayons

I wanted to make new crayons from the huge amount of broken ones we have!  I have seen so many crayon-makeover tutorials around the blogosphere, but this one is different because (1) they are Christmas trees, (2) I used glitter!, and (3) they are gradient-friendly!  Ha ha!

Supplies:
crayons
silicone ice cube tray
glitter
lots of little people to peel the crayon papers off!
 

Directions:
Preheat the oven to 225 F.  Peel the paper wrappers off the crayons and chop into small pieces.


Assemble similar shades of colours together; pack tightly into a silicone ice cube tray. Add a pinch or two of a similar shade glitter.


Place in the oven for 5 minutes.  Check to see if the crayons are thoroughly melted.   If so, remove carefully and place on counter to cool completely.  If not, leave tray in the oven and check every minute or two until fully melted.  Once cooled, pop out of the tray and enjoy!


I think they are so festive!!  I am going to do a couple trays of these for Christmas gifts and stocking stuffers!

Linking up with some great parties!

Wednesday, November 30, 2011

DIY Floral Arrangement

Supplies:
Bowl/vase
Floral foam

Filler (flowers, sticks, etc.)
Something to cover the foam


Directions:
Step 1:  Fill your vessel with floral foam.  I just grabbed this bowl from the kitchen because (1) it was white, (2) modern lines, and (3) it was there!


Step 2:  Start inserting the main pieces.  I trimmed branches from one of my bushes outside last year and spray painted them white after they thoroughly dried out.


Step 3:  Once the main filler is all in, add in the special pieces.  I used two peacock feathers that I trimmed down to size.


These are cute glitter-covered gold branches that I cut apart into little sprays and added in all over.  They went in last as they were the shortest.


Step 4:  Cover up the floral foam with something cute!  Marbles, moss, fruit, pebbles... the possibilities are endless!


Here is the finished product!  (Yes, more decor for the bathroom!  I have to put something in there while the plans are coming into place!!)


Linking up with some great parties!

Related Posts Plugin for WordPress, Blogger...