Saturday, August 20, 2011

Fruit Fly Trap

We brought home a watermelon last week that has since been eaten but left several fruit flies everywhere.  I am starting to wonder if these things can reproduce in a day...

I have tested different types of fruit fly traps over the past few summers, and this is the winner!


Get a glass.  I like to use a goblet so these little pesky guys can die in style.  Ha!


Add some red wine vinegar.  Make sure you swirl it or touch it with your finger to break the skin that can form on the surface.


Cover tightly with plastic wrap. Pokes holes with a dinner fork.  Go slowly and gently.  If the holes are too big, the fruit flies can climb right out again.  Also, a dinner fork tends to have longer and more slender tines than a dessert fork.  Go with the dinner fork if possible.


Wait.  This little guy was on the plastic and inside the glass less than five minutes after I assembled it.


I had a fruit fly block party in about 10-15 minutes!  I can't wait for tomorrow - hopefully none left!!


To dispose:
Leave it out overnight.  Make sure all flies are dead then remove plastic and discard.  Pour liquid down sink.

Repeat if needed.

Just a note:  I have also tested with white wine vinegar and apple cider vinegar.  The red wine vinegar seemed to attract the most fruit flies.

Linking up with some great parties!

Monday, July 18, 2011

Birthday Party: Jedi Training Academy: The Invite

All great parties start with the invitation.  Being barely associated with Star Wars and all the things that go along with it, I searched online and found several ideas for invitation wording.  I wanted the invitation to be just like the rolling paragraphs at the beginning of the first movie.  (First movie meaning first made, not Episode I.  That still confuses me!)

So I merged several ideas together, rewrote most of it, and came up with this invite:

 
The invitation was placed in a large brown envelope with this label:
 
 
Children who responded were given a second directive:

The invitations were a huge hit and promised of wonderful things to come!


Thursday, May 19, 2011

Birthday Party Preview


Here is a preview of one of my parties!  I am hoping to get the whole post up soon.

I posted about the cake here.

Stay tuned!  :)

Wednesday, April 13, 2011

Custom Edible Monogram

We were on our way to a birthday party, and I had just made a pan of Rice Krispie squares.  The gift was wrapped and needed some oomph!  So I cut a letter out of the fresh goody goodness, wrapped in plastic, and attached it to the gift!  I loved it and so did the lucky little girl who received it!!

Step 1: Wrap your gift and tie the ribbons securely.  Select the two longest for securing the letter.


Step 2: Wrap the letter in plastic wrap and attach to gift using the two longest ribbons.  Tie excess length into a bow. 

Monday, April 11, 2011

Paper Easter Eggs Craft

Here is a free and fun Easter craft that you can make with things you probably already have in your house!  It's easy enough for toddlers to do, although they will need assistance with cutting and gluing.

Supplies:
Paper
Pen
Bowl (or something similar for tracing)
Crayons

Extras:
Glitter
Glue

Directions:
1. Trace your bowl with a pen to make your outline.  I used the plastic Ikea kids' bowls because they are oval shaped.
 

2. Colour.


3. Cut shapes out and add glue/glitter if using.  Let dry.
 

4. Hang them up!  I used stick tack to hang them on a mirror, but you could use tape or hang from string or ribbons.  Voila!  Handmade Easter eggs!

Thursday, April 7, 2011

What Comes First: the Apple or the Tree?

I found something super awesome the other day.  I was slicing up an apple and I found some of the seeds broken open and growing roots!  Isn't that crazy?  Sprouting seeds in my apple!  I have never, ever, ever seen that before.  The ones in the picture below are the ones I kept, and the kids are having fun checking the "seed status" every morning.  I am hoping we will be able to plant these once they get a little bit bigger.  I have never had any kind of fruit tree before, so this should be interesting!  Ha!

Arrow #1  The seed on the right that is breaking through the brown casing reminded me of a tulip bulb (dark and papery on the outside, smooth and white on the inside).

Arrow #2  This seed has turned green inside (I think it goes from white to green) and has the beginning of a tiny sprout bump by the arrow tip.

Arrow #3  This seed has completely shed its skin, is fully green, and has split in half from bottom to top.  The two halves are connected at the base where the root is growing.

Arrow #4  These two seeds are still in the apple as their roots are very long and intertwined.  I didn't want to try to separate the roots from the apple core and risk breaking them.  You can see how the roots are all coiled up together.  (I have since been able to remove them from the apple.)
 

Monday, April 4, 2011

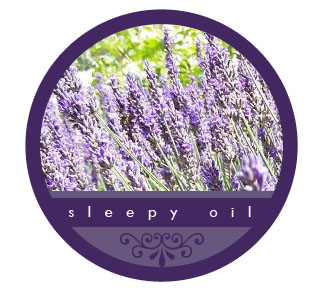
Sleepy Oil Recipe

I designed a logo for a friend last year and got a sweet thank you in the form of a gift certificate for a local spa.  After treating myself and my sister to pedis, I spent the rest of the gift certificate on essential oils.  I think I purchased about 12 or 15 different oils.  I just love essential oils and mixing up little lovelies with them.  Last night I made a calming oil blend that I applied all over, and it helped me drift right off to sleep. :)  Always make sure you avoid your eyes when applying.  Don't ingest this oil blend - for external use only!!

Ingredients
1/3 cup oil* (I used grapeseed)
5 drops vanilla essential oil
5-7 drops lavender essential oil

Directions
Pour oil into a clean plastic or glass container.  Make sure your container has a lid!  Add essential oil 1 drop at a time, vanilla first and then 5 drops of lavender.  Shake well (put the lid on first!!) and sniff.  Add more lavender, 1 drop at a time, shaking and smelling as you go.  Apply!

This would make a great gift!  To make a coordinating body scrub, simply add 3-4 TBSP of brown sugar to the recipe above and store in a wide-mouthed plastic container with lid.

*I use whatever oil I have on hand.  I always have olive oil and almost always have grapeseed oil.  I would not recommend using canola oil or similar oils.  I have also used sweet almond oil, which is lovely.  My favourite right now is grapeseed for a couple of reasons: (1) my skin likes it, (2) doesn't smell too oily, (3) absorbs quickly, and (4) it's not too greasy.


Linking up with some great parties!

Related Posts Plugin for WordPress, Blogger...