
My hubby was very sweet and cut out over 20 tiny little icons for me, and the top 20 were chosen to become magnets. (Those are his hairy manly hands!)

Glass squares or tiles can be purchased as is, or you could use pieces from a sheet of glass mosaic tile - just peel the tiny glass squares off the backing.

Cut the magnets (I used a long strip piece) into squares that are slightly smaller than the back of the glass squares. (Don't want any magnet overhang!) Use hot glue to attach magnets to glass.


After the glue is completely cool and hardened, attach the picture. I used a mixture of super tacky craft glue and water (1:1 ratio) and, using a paintbrush, lightly covered the top of the glass with the glue mixture.

The picture went on immediately and was straightened into place with a toothpick. I had to work quickly in order to place the picture accurately before the glue dried, which was super fast! I then repeated this with the other 19 tiles.
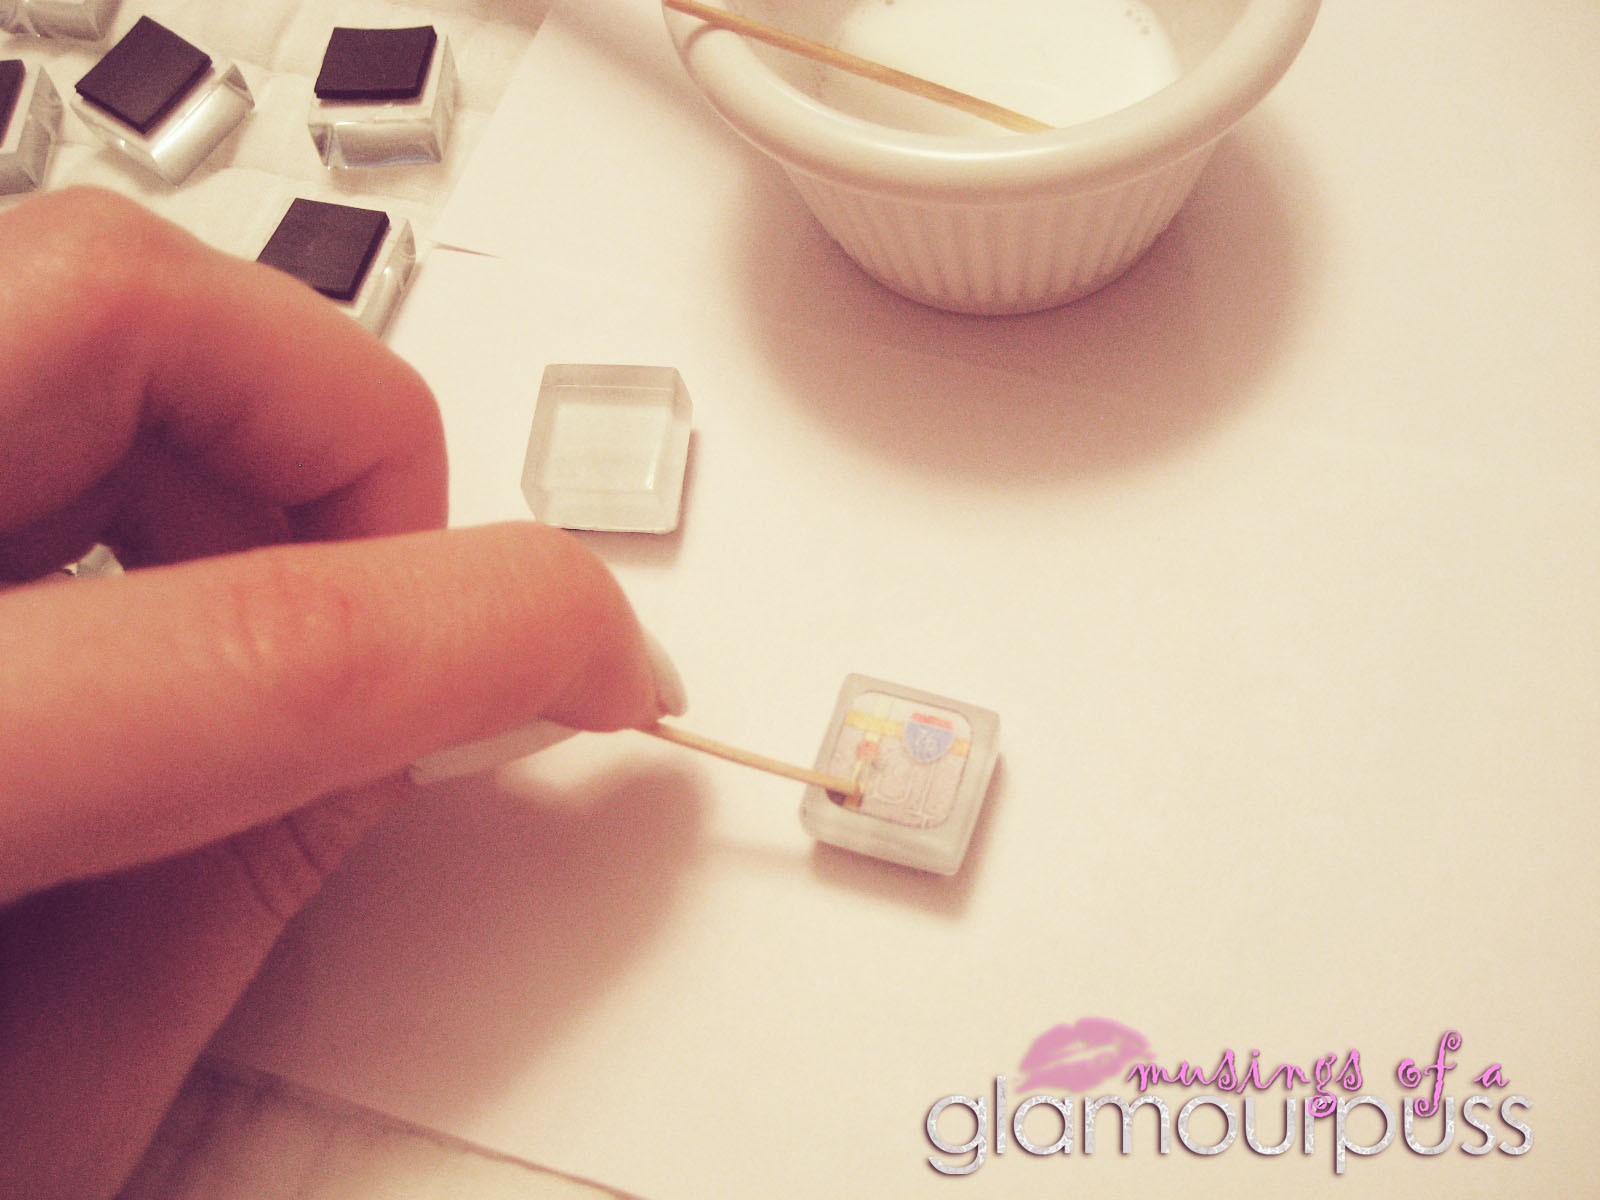
Using the same glue mixture, I painted a light coat over each picture ensuring the glue mixture went right to the edges of the glass. Let it dry thoroughly.

Repeat!

Let cure for 12 hours, then pop them right onto the fridge! Great gift idea for the family techie! (Or the one who thinks (s)he is! Ha!)

Linking up with some great parties!


No comments:
Post a Comment