Tuesday, April 17, 2012

Sensational 60th Birthday Party

I can't resist a good party!  


This one was celebrating a super fabulous lady {my mom!} turning the big 6-0!  I started with a palette of black and white.  For a pop of colour, I went with bright dandelion yellow.  I used faux orange-yellow chrysanthemums to add some colour.


For the food, I chose her favourites that would {mostly} fit the colour scheme:

- regular and vanilla oreos
- black licorice
- coconut meringues
- buttered popcorn
- crispy crunch angel food cake with whipped cream and mandarin coulis
- impossible pie (coconut custard pie)
- single serve veggies and dip 


Because she had so many out of town friends who could not make the party, I requested that they send in a note or letter.  All the well wishes that came in by email got printed onto stationery that I designed and posted on the wall or placed on a table.  I also did the coordinating sensational 60 signs, popcorn cones, bunting signage, and tiny circular 60's.


All in all, it was a wonderful night full of well wishes, yummy food, and longtime friends!

Monday, March 26, 2012

Candy Filled Carrots for Easter Bunnies


We went to a birthday party for a lovely little lady whose birthday is just before Easter.  She also happens to be obsessed with the colour orange.  


I was looking for a fun topper for the gift and, being Easter, I had tons a handful of yummy Easter-y treats around.  A clear cone-shaped bag, layered orange candies, and a woven hair elastic makes a cute candy carrot!


The best thing about them is that they can be filled with anything.  I am thinking these would be super cute in red, white, and blue for the Fourth of July!

Tuesday, February 21, 2012

Frozen Yogurt Bites

This is a cute alternative to popsicles!


In your ice cube tray, fill partially with one flavour of yogurt (I used both vanilla and strawberry flavours).  Freeze for 30 minutes or until barely set.


Fill to the top with second yogurt flavour and freeze until firm.  I added a third layer (vanilla - layer 1; strawberry - layer 2; vanilla - layer 3) as well.  


When yogurt is partially firm, but not stiff, you can insert a stick if desired.  I meant to use lollipop sticks but didn't remember until they were totally frozen.  They worked great as mini bites!  


Try dessert-flavoured yogurt for truffled-inspired bites!

Linking up with some great parties!

Thursday, February 2, 2012

The Perfect Mani / Pedi

You can use this method for both manicures and pedicures; however, my pics are pedi only!
Prep: Remove all previous polish.  Soak your feet for 15 minutes in warm water.  Pat dry and gently push your cuticles back.  Trim, shape, and file nails.  

Supplies:
4 sided nail buffer (I used the Sally Hanson La Cross buffer found at drug stores, Walmart, etc.)
polish
top coat

Step 1: Buff your nails to remove ridges and create a smooth surface.


Gently buff over surface of nail with the coarsest side of nail buffer.  Make sure you don't press too hard - gentle to light pressure is best.


Repeat with all sides of buffer, working from coarse to fine grit.


Using the smoothest side of the buffer, gently go over entire nail surface.  This should bring a lovely shine to the nail.  Use a bit of water to remove the nail dust and particles, and to clean nail.  Repeat for all nails.

Step 2: Apply polish.

This is a super fabulous how-to from Lacquerized.


Use a base coat if you wish.  I used two coats of quick dry polish and my favourite topcoat, Seche Vite.  I love it because the nails stay wet-shiny and super smooth!  I love the fresh-from-the-salon wet look.


And now for the moment of truth (drumroll, please)...

Here are my toes, 5 weeks later:


Yep, some polish has chipped off.  There has been a lot of growth.  I definitely need a redo.  BUT, they are shiny and smooth!  Ha!

Linking up with some great parties!

Monday, January 30, 2012

Free Valentine Printable

My mom was going through some old papers and found this verse laid out to show the word VALENTINE.  She thought I might like it.  I thought it was really cute, so I remade it in a more modern way.  

Enjoy!

6 x 8 Valentine printable


Free for personal use.

Wednesday, January 25, 2012

Goal Lists and Blog Critiques: Do Both!

So January is generally when goals are made, dreams are dreamed in technicolour, and hope for the future is at an all time high.  I usually make a personal goal list every December/January for the new year.  I don't always accomplish everything on my list and some make it onto the following year's list.  

A sample from last year's list:

Accomplished: Read 100 books
Not Accomplished: Ahem, those last 15 preggy pounds

This year, my blog made my goal list: I would like to see growth as well as an improvement in content and display.  I found a couple of blog checklists that gave me a few ideas and I have implemented a couple of them.  (The LinkWithin gadget is one - I had seen the suggestions pop up under posts on other blogs and wanted one so badly for my own blog!  Checked off the list now.) 

But, then I found a fabulous blog critique party and joined!  It was GREAT!  Two lovely bloggers, Alyx and Stephany, were kind enough to send me wonderfully constructive advice and a great review of my blog.  All the participants used this blog critique checklist.  It is awesome to get honest advice from another blogger!  I could ask my hubby but he would tell me it looks great no matter what (and I am sure that, to him, it does), so getting input from others doing the same thing is so helpful.

For example: I have a widescreen monitor at home.  And at work, I have a double monitor setup and both monitors are widescreen.  So when I widened my blog a couple of weeks ago to enable the words in my top ten posts to show up as actual English words (like Millennium Falcon) instead of 

Mi
lle
nn
iu
m

Fa
lc
on


Well, because I am never on a regular sized monitor, it never occurred to me that making my blog fit my widescreen monitor may be a problem on other monitors.  Lesson learned!  (Fix coming soon!)

I give this blog critique party two thumbs up, and I would definitely do it again!

Aaaaand, because I can't leave without a picture, my sweet lil dancer had her first ballet lesson last night.  Here she is!


Unfortunately, joyous pirouettes and excitement didn't happen.  We left early in tears...   Oh well, next week's class cometh.  Fingers crossed!

Friday, January 20, 2012

DIY iPhone Icon Magnets

My hubby was very sweet and cut out over 20 tiny little icons for me, and the top 20 were chosen to become magnets.  (Those are his hairy manly hands!)


Glass squares or tiles can be purchased as is, or you could use pieces from a sheet of glass mosaic tile - just peel the tiny glass squares off the backing.


Cut the magnets (I used a long strip piece) into squares that are slightly smaller than the back of the glass squares. (Don't want any magnet overhang!)  Use hot glue to attach magnets to glass.


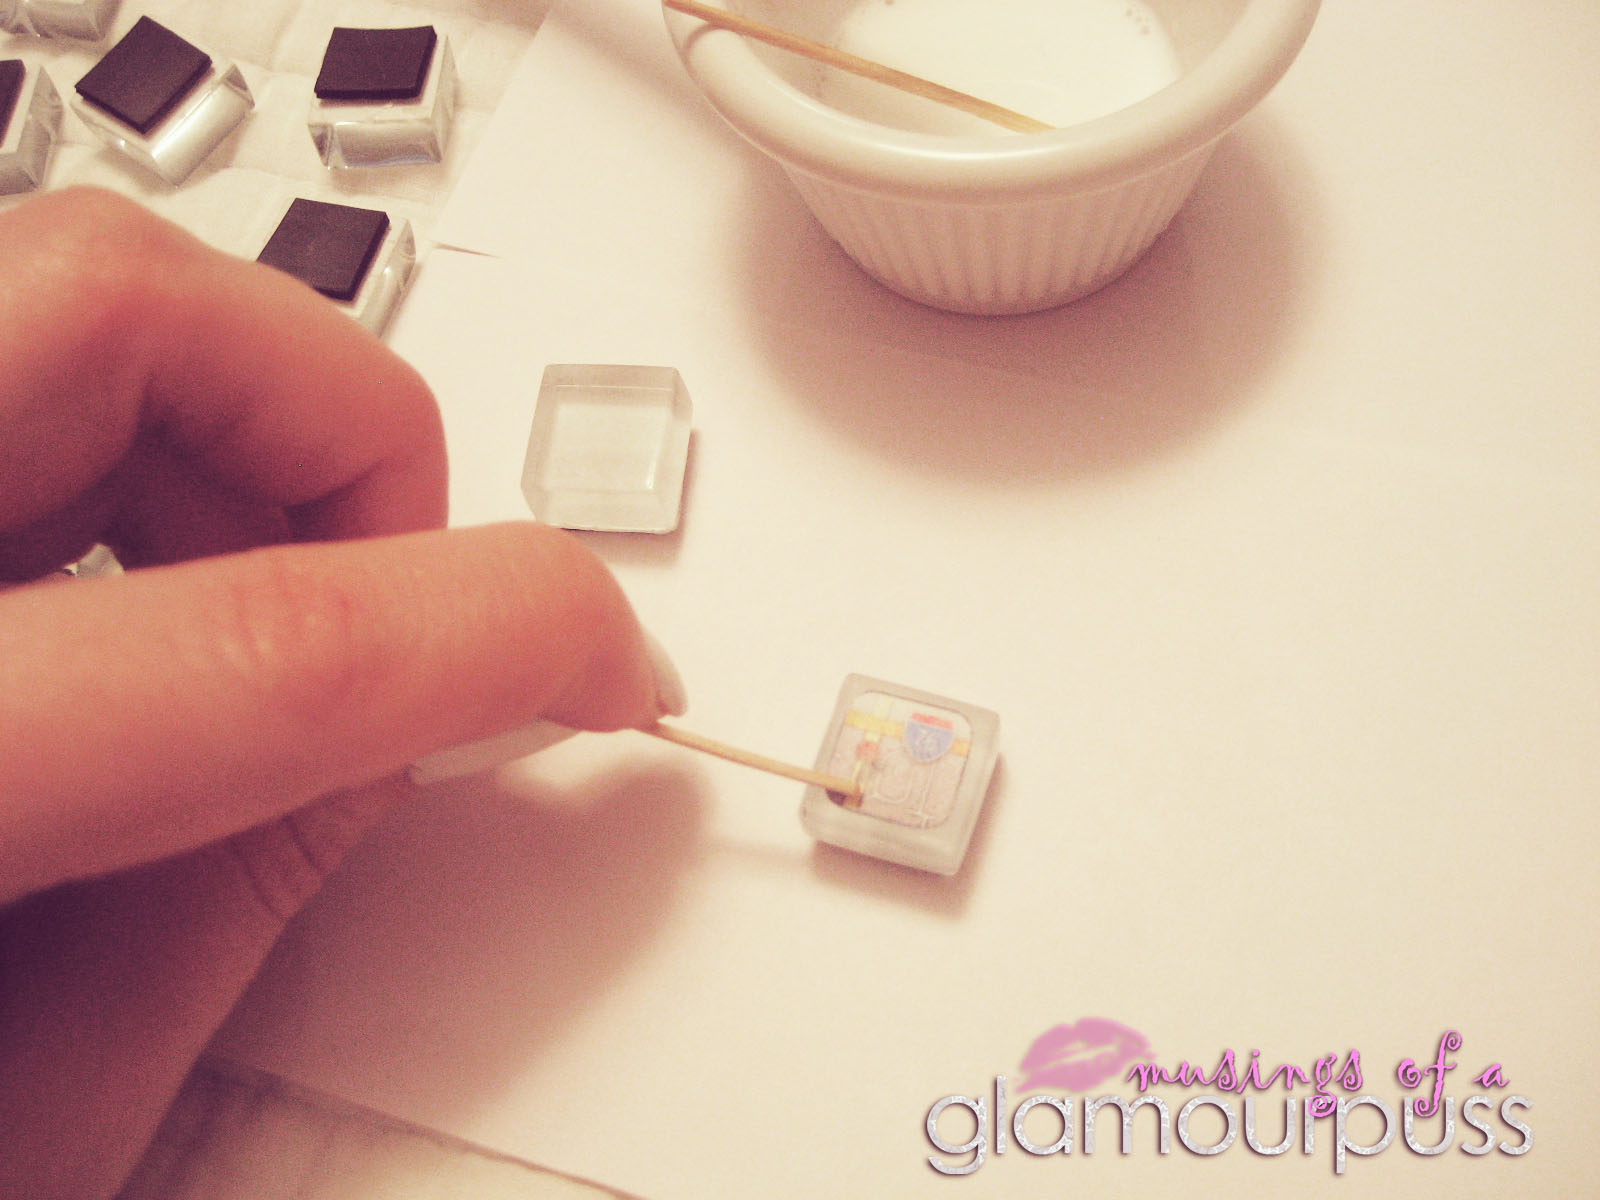
After the glue is completely cool and hardened, attach the picture.  I used a mixture of super tacky craft glue and water (1:1 ratio) and, using a paintbrush, lightly covered the top of the glass with the glue mixture.  


The picture went on immediately and was straightened into place with a toothpick.  I had to work quickly in order to place the picture accurately before the glue dried, which was super fast!  I then repeated this with the other 19 tiles.


Using the same glue mixture, I painted a light coat over each picture ensuring the glue mixture went right to the edges of the glass.  Let it dry thoroughly.  

 
Repeat!


Let cure for 12 hours, then pop them right onto the fridge!  Great gift idea for the family techie!  (Or the one who thinks (s)he is! Ha!)


Linking up with some great  parties!

Related Posts Plugin for WordPress, Blogger...