Showing posts with label fun stuff. Show all posts

Friday, January 20, 2012

DIY iPhone Icon Magnets

My hubby was very sweet and cut out over 20 tiny little icons for me, and the top 20 were chosen to become magnets.  (Those are his hairy manly hands!)


Glass squares or tiles can be purchased as is, or you could use pieces from a sheet of glass mosaic tile - just peel the tiny glass squares off the backing.


Cut the magnets (I used a long strip piece) into squares that are slightly smaller than the back of the glass squares. (Don't want any magnet overhang!)  Use hot glue to attach magnets to glass.


After the glue is completely cool and hardened, attach the picture.  I used a mixture of super tacky craft glue and water (1:1 ratio) and, using a paintbrush, lightly covered the top of the glass with the glue mixture.  


The picture went on immediately and was straightened into place with a toothpick.  I had to work quickly in order to place the picture accurately before the glue dried, which was super fast!  I then repeated this with the other 19 tiles.


Using the same glue mixture, I painted a light coat over each picture ensuring the glue mixture went right to the edges of the glass.  Let it dry thoroughly.  

 
Repeat!


Let cure for 12 hours, then pop them right onto the fridge!  Great gift idea for the family techie!  (Or the one who thinks (s)he is! Ha!)


Linking up with some great  parties!

Wednesday, January 11, 2012

DIY Soft Light Sabers

For my son's Star Wars-themed birthday, we set up several different types of games, all with Star Wars flavour!  One of the games was a light saber duel, and we needed something that could be used without harming any of the kids.  We also still needed some kind of party favour.  Enter the soft light saber, a toy that is still getting lots of use in our house a year and half later!

Supplies:
foam pool noodle
electrical tape in 1-2 colours
duct tape in black

magic marker


Directions:

1. Cut the pool noodle in half.

2. Wrap one end of the pool noodle with three strips of duct tape, creating the light saber handle.  Wrap each end of the duct tape in coloured electrical tape.

3. Use the magic marker (we used fat Sharpies) to darken the cut end.

4. Have fun!


Linking up with some great  parties!

Saturday, January 7, 2012

Neon Pancakes -aka- Pancake Tribute to the 1980's!

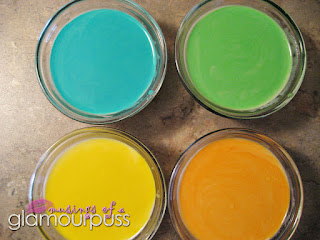
Prep your favourite pancake recipe, and separate batter into bowls.  


Preheat your frying pan or griddle while adding colour to each bowl.  I use Wilton gel colours.  They are super bright and you can get big colour impact with a tiny bit of gel.  


Get a large spoon in each bowl.  (Alternately, use one empty plastic squeeze bottle for each colour.)  Spoon (or squeeze) your base colour onto the griddle.  Working very quickly, add some of each colour to each pancake.  I did 3 pancakes at a time, and only had about 30 seconds to get all the colours into each pancake.  You will likely not end up with perfect circles here so if you have OCD tendencies, you may want to skip this!  Ha!  


And flip to cook the other side.  You can tell I started with green!


Ta da!  It is like the 80's threw up onto your pancakes!  Notice the size similarities to 80's shoulder pads...  He he!


Of course, my kids have no clue what the 80's are, so they just thought they were getting super awesome pancakes! 


Linking up with some great parties!

Monday, September 5, 2011

Pan Flute Craft

My son made this cute craft at school.  You will need 8 drinking straws and tape for this craft.  

Simply cut straws into four lengths (two straws per length) and tape together!

Blow gently through the straws to play your pan flute!  Try blowing directly on the straws and then without touching your lips to the straws and see what sounds you can make.


Linking up with some great parties!

Wednesday, April 13, 2011

Custom Edible Monogram

We were on our way to a birthday party, and I had just made a pan of Rice Krispie squares.  The gift was wrapped and needed some oomph!  So I cut a letter out of the fresh goody goodness, wrapped in plastic, and attached it to the gift!  I loved it and so did the lucky little girl who received it!!

Step 1: Wrap your gift and tie the ribbons securely.  Select the two longest for securing the letter.


Step 2: Wrap the letter in plastic wrap and attach to gift using the two longest ribbons.  Tie excess length into a bow. 

Monday, April 11, 2011

Paper Easter Eggs Craft

Here is a free and fun Easter craft that you can make with things you probably already have in your house!  It's easy enough for toddlers to do, although they will need assistance with cutting and gluing.

Supplies:
Paper
Pen
Bowl (or something similar for tracing)
Crayons

Extras:
Glitter
Glue

Directions:
1. Trace your bowl with a pen to make your outline.  I used the plastic Ikea kids' bowls because they are oval shaped.
 

2. Colour.


3. Cut shapes out and add glue/glitter if using.  Let dry.
 

4. Hang them up!  I used stick tack to hang them on a mirror, but you could use tape or hang from string or ribbons.  Voila!  Handmade Easter eggs!

Thursday, April 7, 2011

What Comes First: the Apple or the Tree?

I found something super awesome the other day.  I was slicing up an apple and I found some of the seeds broken open and growing roots!  Isn't that crazy?  Sprouting seeds in my apple!  I have never, ever, ever seen that before.  The ones in the picture below are the ones I kept, and the kids are having fun checking the "seed status" every morning.  I am hoping we will be able to plant these once they get a little bit bigger.  I have never had any kind of fruit tree before, so this should be interesting!  Ha!

Arrow #1  The seed on the right that is breaking through the brown casing reminded me of a tulip bulb (dark and papery on the outside, smooth and white on the inside).

Arrow #2  This seed has turned green inside (I think it goes from white to green) and has the beginning of a tiny sprout bump by the arrow tip.

Arrow #3  This seed has completely shed its skin, is fully green, and has split in half from bottom to top.  The two halves are connected at the base where the root is growing.

Arrow #4  These two seeds are still in the apple as their roots are very long and intertwined.  I didn't want to try to separate the roots from the apple core and risk breaking them.  You can see how the roots are all coiled up together.  (I have since been able to remove them from the apple.)
 

Related Posts Plugin for WordPress, Blogger...